

|
|
| Previous - Viewing your design. | Return to Index. | Next - Creating page layouts, printing and emailing. |
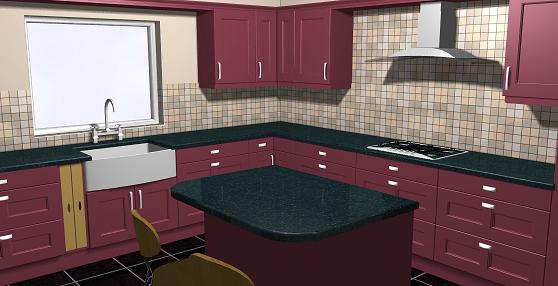
Selecting a manufacturer and range will not only change the door shape used on the units in the design, but will also change the colours.
See Setting Up Your Design - Door Type for details of changing the range.
Every item that makes up your design has a series of colours associated with it.
To change the colours that are used across the design, click "This Design" - "Photo Realism Colours".
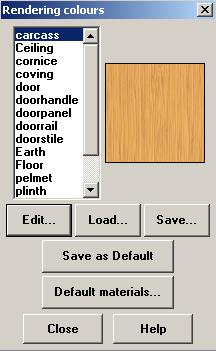
This presents a list of the colours (doorpanel, plinth etc) that are currently in use within your design. Select the colour you wish to change by left-clicking on it and then pressing the "Edit" button. See the Colour and Textures section of this chapter for details on selecting a colour.
If you wish to change multiple colours to the same colour/texture, hold down "Control"/"Ctrl" on the keyboard and then left-click on the items on the list you wish to change. Once all the items are selected, you can release the "Control"/"Ctrl" key and press "Edit". The colour/texture you select will be applied to all the items you had selected.
Return to top.
The list of colours under "This Design" - "Photo Realism Colours" covers all the colours currently in use in your design. This includes the walls (wall), wall tiles (walltile), flooring (floor) and appliances (sink, tap, hob, oven). Also on the list are the colours of the attachments in the design - cornice, pelmet, plinth, worktop.
Select and change the items as described above.
Return to top.
It is also possible to edit the colours of an individual item on the design.
Edit the item as described in Positioning Units With DND.
Return to top.
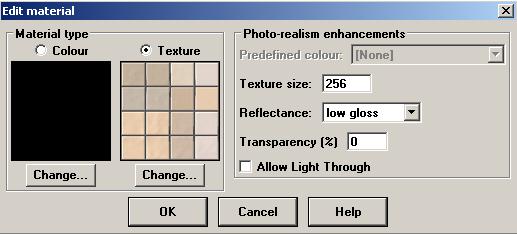
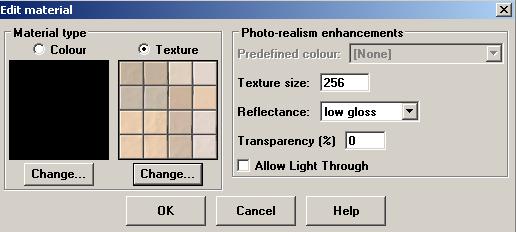
When changing a colour, either for the whole design or for an individual item, you will be presented with the same dialog box - the Edit Material dialog (below).
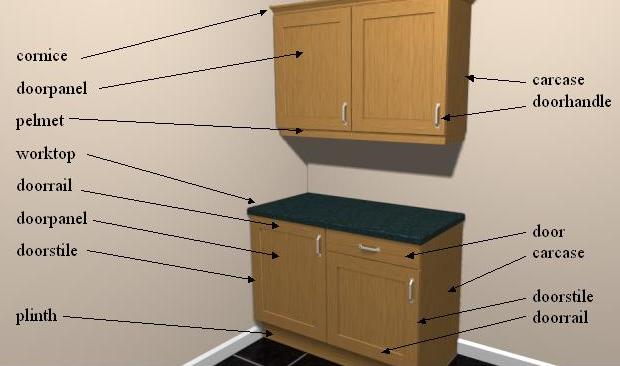
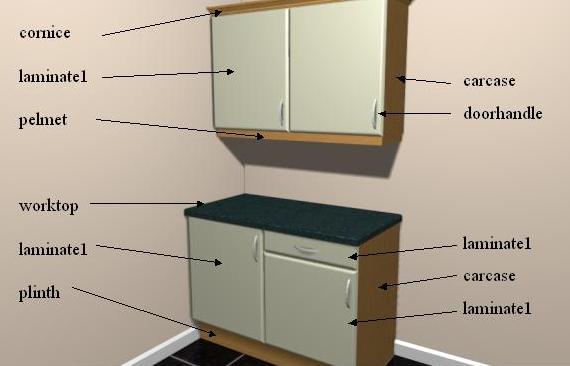
A colour is used when you want a single, solid colour across the entire item.
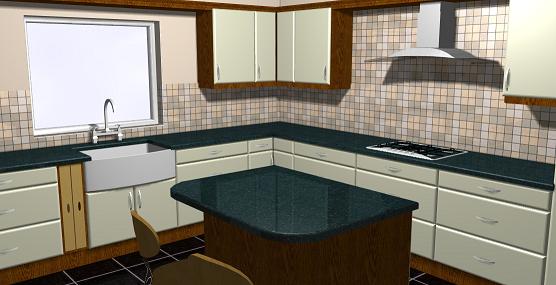
In the above image, the door/drawer fronts, wall and appliances are all using a colour.
To use a colour, select the radio button over the colour preview.
To change a colour, click on the "Change..." button beneath the colour preview.
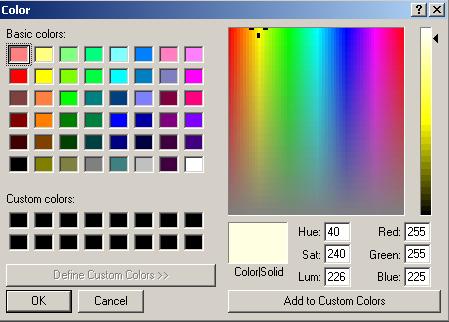
You can select one of the pre-defined basic colours or create your own by clicking on the colour mixer to the right-hand side. To change the intensity of the colour use the slider on the far-right.
It is also possible to specify a colour from it's Red/Green/Blue constituents by entering values in the boxes bottom-right. Charts for converting from Pantone colours to Red/Green/Blue values can be found on the Internet.
If you wish to use the colour you have created on other items in your design you can click "Add to custom colours". The colour will appear in one of the boxes under "Custom Colours". NOTE - you need to click in the custom colours box you wish the colour to appear in BEFORE creating the colour, otherwise it will replace the first custom colour.
Once you have selected a colour, click "OK" to return to the "Edit Material" dialog.
A texture is used when you require a pattern, such as a wood grain, a tile, granite or marble.
In the above image the carcase/sides, cornice, pelmet, wall tile and worktop are all using textures.
To use a texture, select the radio button over the texture preview.
To change a texture, click on the "Change..." button beneath the texture preview.
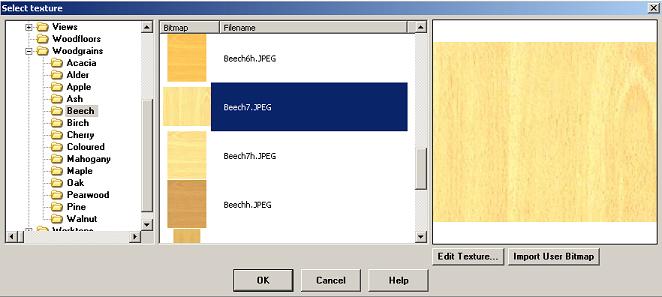
The available textures arranged in folders (left-most pane). Clicking on a folder displays the contents of that folder in the middle pane. Selecting a texture from the middle pane shows an enlarged version in the right-most pane.
Some folders contain sub-folders. These are denoted by a "+" symbol. Clicking on it will expand the view in the left-most pane to show the folders contained within.
When selecting a texture, what you see is what you get. However, it is possible to make some changes to the selected texture by clicking on the "Edit Texture" button. This is covered in Editing and Importing your own textures.
Once you have select your texture, click "OK" to return to the "Edit materials" dialog, where you will need to specify the Texture Size.
A texture is an image. That image can contain a single tile, a block of tiles, a sample of worksurface or a wood grain. The texture size specifies how large that image should appear in your design.
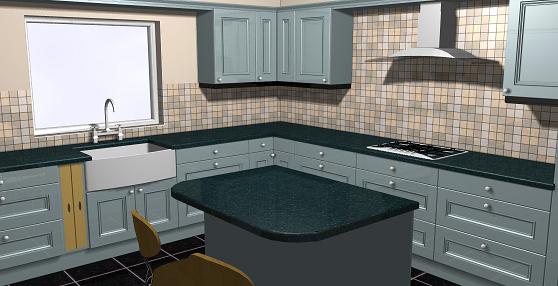
The wall tile in the above image is defined as:
The texture is an image of 16 tiles, arranged 4 x 4. If, in reality, the tiles are 64mm on a side, the texture image would be 256mm on a side. Hence, the texture size is 256.

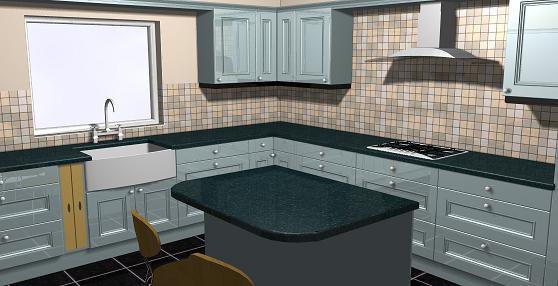
Exactly the same texture, except the texture size has been increased to 512.
You can specify any texture size. The texture will be stretched to the required size. However, the larger the image is made, the greater the chance of the texture losing resolution and appearing "blocky".
For other textures, such as wood grains or worktop finishes, the texture size isn't as easy to determine. However, a good starting point is between 300 to 400 (this is the size of the sample that is used to create image).
When choosing a wood grain, the direction of the grain is important. The texture will be drawn as it appears in the sample image. The wood grains supplied are all available as either a horizontal of vertical version.
Reflectance can be selected for both colour and texture. The reflectance alters the finish on the selected colour/texture. Click the drop-down arrow to select the desired finish.
The below images show the same design with the reflectance on the unit doors changed from low, to medium, then high gloss.

When you save your design ("File" - "Save" or "Save As...") you are saving the layout of your design, the units in that design and their positions. The colour scheme is NOT saved as part of the design. This is for two reasons.
IMPORTANT - you will not be asked to save your colour scheme unless you have Auto Save/Load activated. Changes to the colour scheme will be lost. Instructions on activating/de-activating this feature can be found in CHAPTER X - Auto Save/Load.
To save the current colour scheme, click "This Design" - "Photo Realism Colours".
Click "Save". Enter a file name in the box at the bottom of the dialog box that appears. How you name your colour schemes is entirely up to you. Click "Save" to save once you have specified a name. Close the "Rendering colours" dialog to return to your design.
IMPORTANT - When you load a design, it will default back to the original colour scheme until you load a colour scheme UNLESS you have Auto Save/Load activated. Instructions on activating/de-activating this feature can be found in CHAPTER X - Auto Save/Load.
To load a colour scheme, click "This Design" - "Photo Realism Colours", then click "Load". Select the colour scheme you wish to use. Close the "Rendering colours" dialog to return to your design.
Return to top.
The default colour scheme is the one used whenever you start a new design.
Change the colour scheme in your design to the one you want to be the default. Click "This Design" - "Photo Realism Colours".
Click "Save as Default".
NOTE - the change is permanent and cannot be undone.
Return to top.